December was interesting. Wifey was in hospital for a planned surgery. It was supposed to be 3-5 days for recovery before being discharged home. It turned into two surgeries, fifteen days in hospital, and two weeks at her parents’ before coming home. Thankfully she was discharged before Christmas, so we didn’t have to have Christmas dinner in the Tucson Medical Center cafeteria. We expect her home this weekend; she’s doing well and we’re excited to have her back in the house!
Construction
Shower tile
The most exciting thing lately has been the shower. Over the last two weeks our tile setter has been working hard and doing a beautiful job tiling our shower.
Andrea and I decided to invest a lot of our savings from building our bathroom DIY into some nice finishes. Such as expensive, high-end tile. We found out later that the tile we picked out is truly an exclusive item: the factory in Italy went out of business, and we bought the last seven boxes of tile available anywhere.
Since we had a lot invested in the tile, finding a good tile setter was critical for us. We needed a pro who knew how to properly waterproof the shower. If the shower were to leak, our pretty and very expensive tile would have to be torn out to effect a repair. Our tile is irreplaceable, so a shower failure is not an option. We want this shower to outlast us.
Plumbing pictures
As promised, here are some pictures of recent work. Today I’m going to focus on plumbing. This week the place is getting the drywall installed, taped, and textured; we’ll have more pictures for that soon!
So, without further ado, here are the pictures.
Passed inspections!
We passed a whole bunch of inspections over the past few days, yay! We’ve now passed all our inspections pre-drywall and are now on the downhill slope. We decided to hire out the drywall and tile, since both can be quite time-consuming and the cost savings over DIY are not that much relative to, say, plumbing.
Presently I am installing batt insulation in the ceiling; I have to be done by Friday because that’s when the drywallers come in. I’ve only got the evenings to work, though; hopefully I can work fast when it’s 8pm and I’ve already spent all day in the office or chasing kids at home.
Also working on the greywater line. It involves digging a lot of trenches. The ground is really hard so it is conducive to very big and very sore muscles. I hired Caleb’s brother Daniel to do most of the digging so I could just lay the pipe. He gets the muscles and I get black ABS cement on my hands.
Siding Prep
The last couple weeks have been fits and starts. Basically finishing up the exterior insulation and installing the strapping.

I used 3/4" plywood "straps" screwed through the foam into the studs. The straps serve as attachment points for the siding, which I will put on next.
Finishing the foam was a laborious process. All the seams of the foam had to be taped. If I couldn’t tape them for some reason, I had to fill the gaps with spray foam. This was important to make sure there were no air leaks (or at least as few as possible).

To give an idea of how meticulous the air sealing has to be, here is what I did to seal around the sewer cleanout. I first sprayed expanding foam, then waited for the foam to cure before I trimmed it and finished with tape.

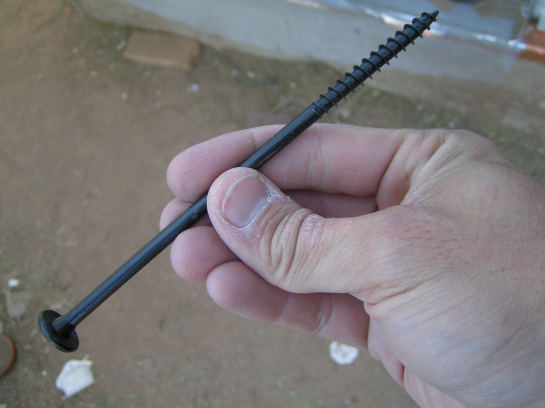
I had to use 6" long screws to attach the strapping. It was a little nerve-wracking to drive these screws through thick foam, but I only missed a stud three times. I had to use a corded drill; the cordless drivers could only drive a few of these at a time before the battery power gave out. I almost overheated the drill, too.
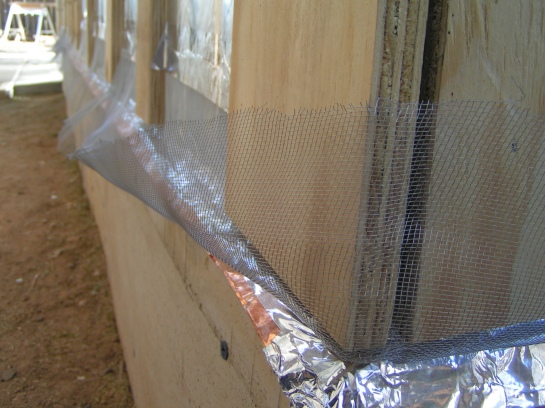
At the top and bottom of the walls I had to put insect screening. Once the siding is on, there is a continuous air space between the siding and the foil-faced foam. The concept is called a “ventilated rainscreen“. The siding can be a little leaky; any moisture that gets behind will run down the foam and out of the wall, or evaporate. This improves the durability of the building by reducing water intrusion and extending the life of the siding and, in the case of the wood parts, its paint or stain.
The air gap also allows the reflective foil facing to serve as a radiant barrier. This is pretty important in a hot climate like ours. It reflects a lot of solar energy away from the building in the summer time.
Starting Insulation
I started installing the foam insulation on the exterior walls this past weekend. I took a couple pictures this morning but it was difficult to get good shots. The glare from the sun reflecting off the foil facing was blinding!
There will be two and a half inches of polyisocyanurate foam insulation board on the outside. It’s predominantly in two layers. The first layer is an inch thick, and is tacked to the framing with cap nails. The second layer is an inch and a half thick, and is temporarily held in place with long screws and plywood washers until we install the 3/4″-thick plywood strapping. We use 6″ screws to secure the strapping to the framing.
Later, once all the strapping is installed, we’ll attach the siding to that. We will put corrugated steel siding on the north and south walls, and redwood lap siding on the east and west walls.
So far I’ve got the north wall insulation complete, most of the east wall, and the first layer on the south wall.
The foam insulation is fairly expensive, but there are many advantages of the foam insulation over conventional batts:
- The continuous foam on the exterior eliminates “thermal bridging”, which is what happens when you insulate only between wood studs. Wood studs are terrible insulators.
- The foam has a foil facing which serves as a radiant barrier. Put it in the sun and you can feel the heat reflected back at you. This is invaluable in a hot, desert climate.
- Foam has a higher insulation value per inch than batt insulation. If it’s thick enough, you can eliminate batt insulation entirely and leave the stud bays open, thereby facilitating utility maintenance in the eventual remodel.
- Batt insulation is difficult to install properly, especially if you have pipes or wires in your wall. To get the rated insulation value, batts have to be installed darn near perfectly.
- Foil-faced foam is waterproof and impermeable, so it serves as both a moisture barrier and a vapor barrier. If installed on only one side of a wall, it makes the house more resistant to moisture. Just be careful not to create a “moisture sandwich” by installing impermeable surfaces on both sides of the wall. By choosing to use polyiso on the exterior, I can’t use a waterproofing membrane on the walls of our shower.
- Foam insulation board doesn’t itch or release cancer-causing fibers into the air for you to breathe. It’s extremely easy to cut, handle, and install.
I chose this design because I wanted thin walls, and I wanted to be able to run utilities like pipes and wires in exterior walls. I am able to have a high-performance structure framed with 2X4s instead of 2X6s; in a bathroom, those inches really count.
This next weekend, Caleb and I will finish the foam install and the strapping.
A Greenish Addition
 Our bathroom addition isn’t going for any sort of “Green” certification, but I am trying to make it as “greenish” as possible. I’ve definitely had some Green Building Fails, like the foundation using seven cubic yards of concrete. That’s seven cubic yards of carbon into the atmosphere for a piddly bathroom, compliments of yours truly. I definitely could have done better!
But it vastly exceeds insulation requirements for our climate, is sited for passive solar, is built using durable materials and methods, specifies no mechanical heating or cooling, specifies energy-efficient or low-water-use appliances and fixtures, provides a permanent greywater reuse system, and it even calls for a rain barrel. Perhaps it will look cool enough that future owners won’t decide it’s ugly and tear it apart for remodeling.
Most of those green features really don’t add much to the cost of the addition. Some even qualify for rebates and tax credits. But sometimes trying to find stuff is a real pain (try asking a local lumberyard about Forest Stewarship Council-certified lumber). Trying to determine what really is environmentally responsible versus what is simply “greenwashed” is a challenge, too.
Given that, I think our addition should qualify for some kind of Green award after all. Maybe if I give my kids some markers and green construction paper they’ll make one for me. (They’ll have to learn how to spell first.)
Windows and door
This weekend we installed the three clerestory windows and the door.
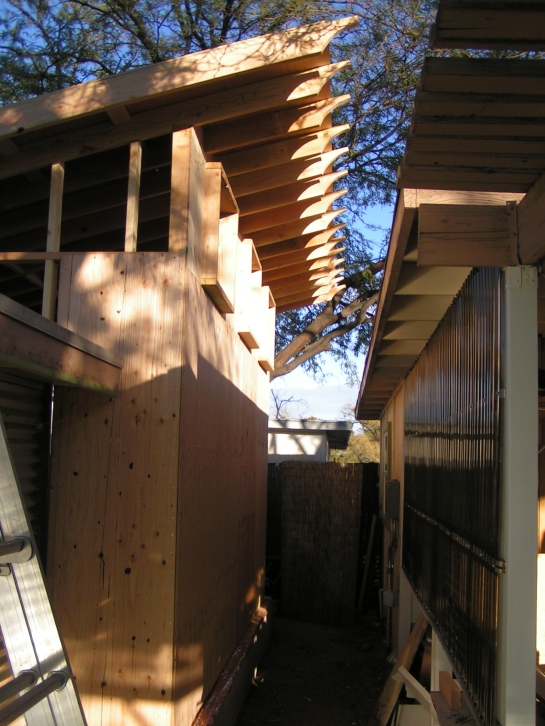
The shed next door proved to be a handy platform for installing the windows. I built a sturdy scaffold from extra 2x4s and plywood and leaned it onto the shed roof.
The windows are of the awning type, which means they are hinged at the top and open with a crank. The screens go on the inside, though they aren’t installed yet. I will install them after construction is complete so they don’t get torn. They are aluminum-clad wood windows and very energy efficient units. Installing them was pretty easy, except that the self-stick flashing doesn’t stick to tarpaper very well. Nothing a few staples couldn’t fix.
The door is really pretty. The light that comes through in the morning is very cool. I can’t wait to take my morning showers in here!
The door is extremely heavy. It is a fiberglass door (we didn’t want a wood or steel door in a shower area) but the weight comes from all the glass. It is triple-paned, which was necessary to meet energy efficiency requirements. Since I was careful to make sure the stud on the hinge side was plumb during framing, the door was not difficult to set. The hardest part (other than wrastling its bulk into place) was installing the lockset, which required some modifications to the stock bore.
Well, as of today, the addition is “locked up”… literally. Hooray! A major milestone achieved. Next week: lots of foam insulation.
Interior walls
This past weekend we framed the interior walls, and Caleb finished tarpapering the outside. Just in time for rain, too, as we got about a tenth of an inch yesterday. The metal roof and flashing did their job of keeping things dry inside. Yay!
Walls and a roof!
I took last week off, and Caleb and I made rapid progress. We finished framing, sheathed the walls and roof in plywood, got most of the tar paper up, insulated the roof and one wall, and installed the metal roof. Whew!
I used pressure-treated lumber to frame the shower area. It is regular lumber treated with stuff that bugs and fungus don’t like. Why do this, you ask? The foam insulation I plan to install on the outside of the house is vapor-impermeable polyisocyanurate (building science nerd-speak for fancy foam board). Because the foam board doesn’t allow any moisture to pass to the outside, the building has to dry toward the interior. Since the interior is a humid shower, I wanted some insurance against rot and termites. We didn’t use plywood around the shower, either. Confused? Good. Just know it’s awesomely over-thought.
This is the roof deck shortly before we finished nailing on the plywood. We tried installing the plywood on the roof before installing the plywood on the walls, but the structure was very wobbly. The plywood really provides incredible strength. We were using a nail gun that shot smaller nails than are in the code book, so we had to use extra nails. There are thousands of nails in this little room!
This is what the room looked like when we called for inspection. The inspector needed to see that all the plywood was nailed on properly and in the right locations. We mostly passed. Which is to say, we slightly didn’t pass. One panel didn’t provide enough shear bracing for the west wall (it’s the one right in front of you, to the left). Long story short, there was some confusion about what I thought I permitted and what was actually allowed. But the inspector was cool and said we could continue, we just needed to show that we had provided adequate shear bracing before we put up drywall.
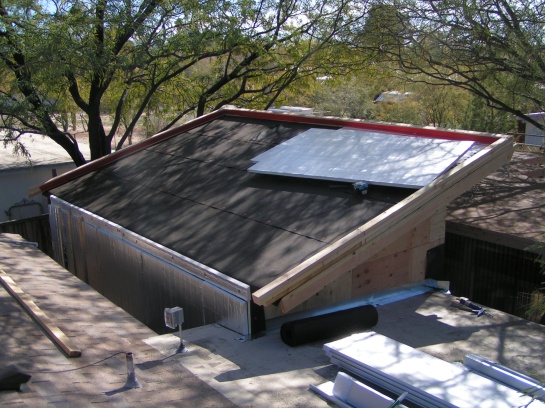
I was glad to move on to roofing. After shooting thousands of nails I was really tired of plywood. The roof is pretty unusual: the insulation is on top of the roof deck. Four and a half inches of polyiso foam over felt over plywood. And steel on top of all that.
The thick foam provides a little more insulation value than is required by code in our area. There will be another six inches of rock wool insulation between the rafters below, making a fairly superinsulated roof. Cozy!
We installed the galvalume roof ourselves. A local metal roof manufacturer measures the roof deck and fabricates all the pieces, then delivers them. They provide some basic instructions and loan you a few necessary tools. Installing the roof was pretty easy. There was some cursing over the waste vent pipe flashing, though.
We finished the roof as it was getting dark, so no pic yet. But it’s purdy.


